Scroll through the lesson and click on notation/video/audio links to load the interactive players.
Please subscribe to get full access to all lessons for only $7.95/month PLUS 1 week free trial.

Riff Interactive lessons are
LESS expensive and
MORE interactive than alternatives!
More Info
|
|
| Lesson Subject:
Acoustic Folk Guitar |
| What you learn:
Picking & Chords |
| Teacher: Michael Johnson |
Michael: This lesson is part 5 of the Acoustic Folk
Guitar series. The lesson sample uses variations of the B minor chord. We're
going to cover several chords in this lesson. check out the lesson
sample:
Lesson Sample
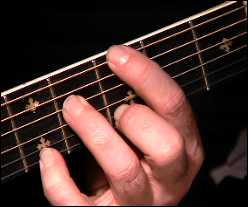
Michael:
Here's the basic B min pattern we will
build on.
Pattern 1
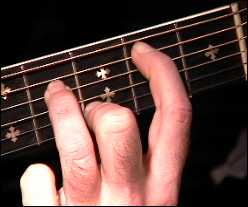
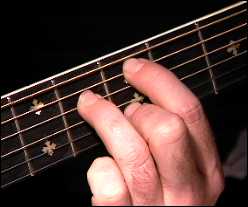
Michael:
The video will show you the basic
picking pattern, first, here's the B min chord, the second chord you lift
your first finger.
Michael:
Notice how the notes play open positions
on the 5th and 1st strings. Here's a looping jam track you can play over.
Jam Track - Pattern 1
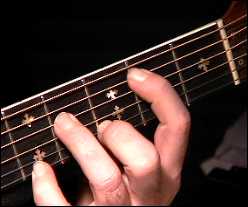
Michael: OK, let's get into some other patterns,
this next pattern uses the Bm7 chord.
pattern 2
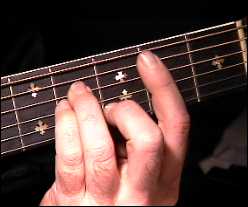
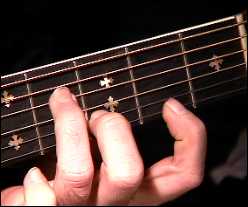
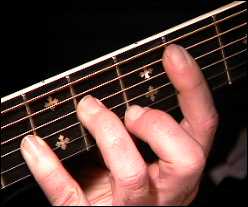
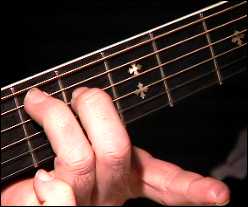
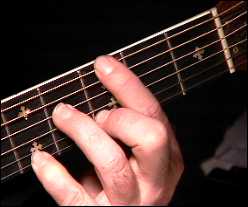
Michael:
It's basically the same, but you have
more open string notes in this pattern. I like the sound of this pattern, here's
the pictures of the fingerings:
Michael:
Here's the jam track you can practice
over:
Jam Track -
Pattern 2
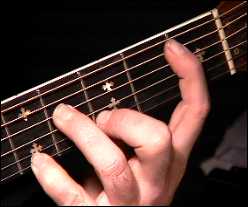
Michael: Now let's
take the last pattern and make a subtle change.
pattern 3
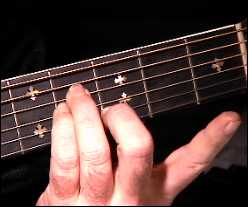
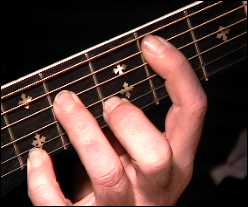
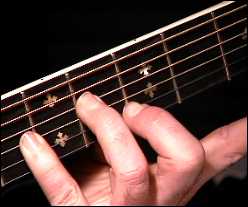
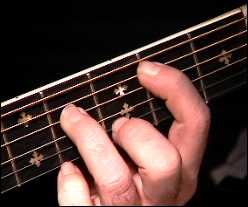
Michael:
Notice you have more open string notes,
here's the fingerings.
Jam Track - Pattern 3
Michael:
Each of these patterns will have a jam
track. You can also play the B minor scale over
these tracks, here's the pattern:
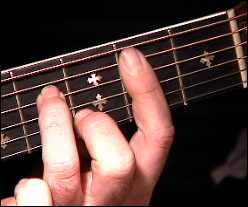
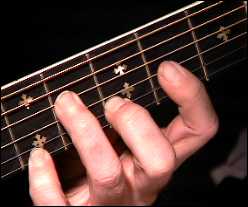
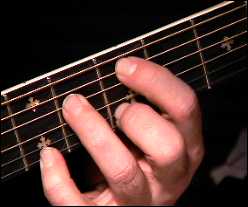
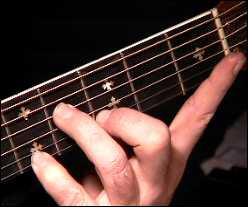
Michael:
Now you can add your 4th finger on the 5th fret/1st sting, this adds to the min7
chord.
pattern 4
Michael:
There are a few subtle, but simple
alterations that you can make.
Jam Track - Pattern 4
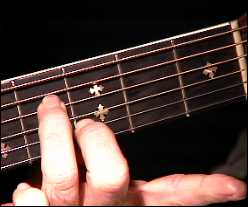
Michael:
Notice I just move the first finger to
the higher strings, which allows you to use the open A (5th). Think of how many
combinations you can come up on your own just with these chords. This is a great
exercise to help you write your own
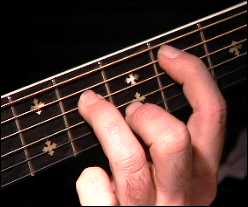
songs! Now it's time for a challenge, this next
chord sequence uses the Bm add9 chord, check out the
fingerings.
pattern 5
Michael:
This will make your fingers ache after
awhile.
Jam Track
- Pattern 5
Rhinosaur: wow
Ginger: That's a stretch!
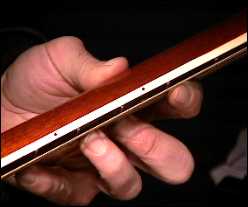
Michael: You bet, take your time on this one. If
you have trouble at first, just play the other patterns and keep practicing this
one until you can reach the entire chord. Also make sure the thumb is holding
the back of the neck firmly and try adjusting your elbow as well to see if that
helps you reach the the chord better.
Rhinosaur: Thumb in the middle of the neck, on the back?
Michael:
Yes Rhino.
Ginger: LOL, but I can do it an octave higher.
Michael:
See how the thumb applies
pressure, there you go Ginger, you're being creative, I like that
8-)
Ginger:
Thanx teach, or I'll need a glue to permanently implant my
pinky.
Michael:
Now we'll use some of the chords and
ascend to other chords.
pattern 6
Michael:
Notice the Pink Floyd type chord towards
the end, it has a D 1, 3 and sus4.
Michael:
Notice how the open G string (3rd) rings
open throughout all these chords.
Jam Track - Pattern 6
Michael:
Now you can alter that pattern as well,
here's another variation.
pattern 7
Michael:
In this pattern you start with the same
chord, the second bass note moves to C. You add your little finger on the 5th
fret/1st string and the last note you move your first finger to the G on the 3rd
fret/6th string.
Jam Track - Pattern 7
Liza: This
sounds awesome on a 12 string!
Michael: I bet it does Liza! This last pattern is
a little tough, you have the same chord structure, but you add a descending bass
line.
pattern 8
Michael:
Notice you leave the little finger on
the 1st string/5th fret:
Jam Track - Pattern 8
Michael:
Well that's it for this lesson. I hope
you enjoyed learning these new chords, practice hard everybody, and see you
next lesson!
|
<< load notation from left
|
|
<< load audio from left
|
<< load audio from left
|